SD-WAN allows us to create an efficient network resilient to connectivity issues between our office and cloud services, e.g., AWS, Azure, GPC. In short, it provides continuous access to critical services in the cloud.
SD-WAN is a software-defined approach to managing Wide-Area Networks (WAN). It allows you to offload internet-bound traffic. i.e., private WAN services remain available for real-time and mission-critical applications. This added flexibility improves traffic flow and reduces pressure on the network.

SD-WAN platforms create hybrid networks that integrate broadband and other network services into the corporate WAN while maintaining the performance and security of real-time and sensitive applications.

SD-WAN with Application Aware Routing can measure and monitor the performance of multiple services in a hybrid network. It uses application routing to offer more granular control of where and when an application uses a specific service, allowing better use of the overall network.

Some of the key benefits of SD-WAN include the following:

1. Reduced cost with transport independence across MPLS, 3G/4G LTE, and others
2. Improve business application performance due to increased availability and agility
3. Optimized user experience and efficiency with SaaS and public cloud applications.

Source: https://docs.fortinet.com/document/fortigate/6.2.0/cookbook/19246/sd-wan
Configuration
The main requirement to run SD-WAN services is to have a minimum of two active and fully configured Internet connections on the FortiGate unit.
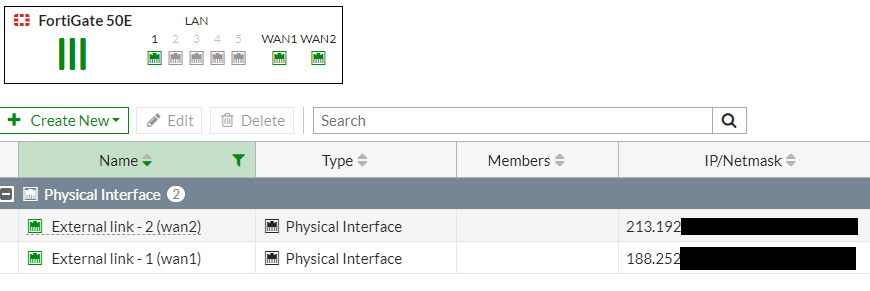
For laboratory purposes, we have used an older FortiGate 50E unit with software 6.2.10. In newer software versions, the configuration is similar.
In the case of SD-WAN configuration, the first step is to verify that the feature is active on the device. Navigate to System > Feature visibility tab and check if the SD-WAN option is selected.

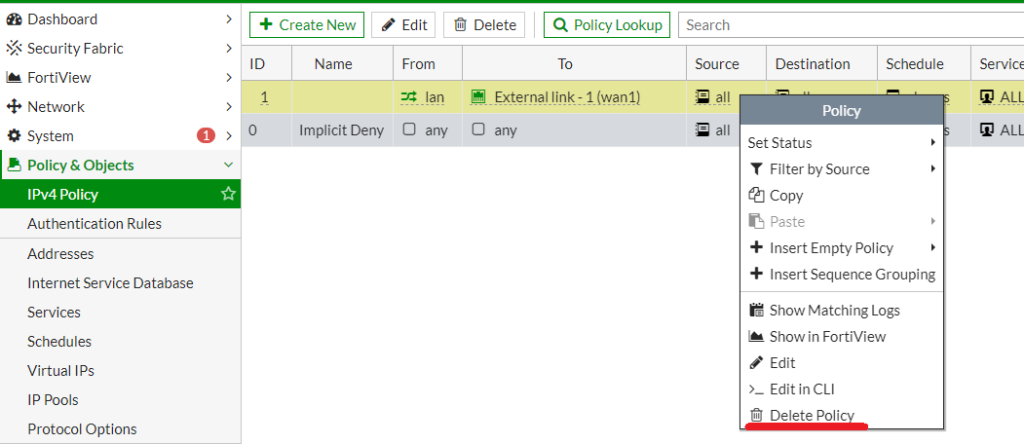
Before creating an interface, make sure to remove WAN interfaces from currently used policies. For this, navigate to Policy & Objects > Firewall Policy.
If you remove WAN interfaces from a policy, you will lose the internet connection.
Then navigate to Network > SD-WAN and create a new SD-WAN interface.
You need to click Create New SD-WAN Member on all the ports used in SD-WAN. To properly create an SD-WAN Member, select the WAN interface and assign the correct network gateway address.

Then, we need to approve the creation of the new interface and add all the ports that will form our new interface.

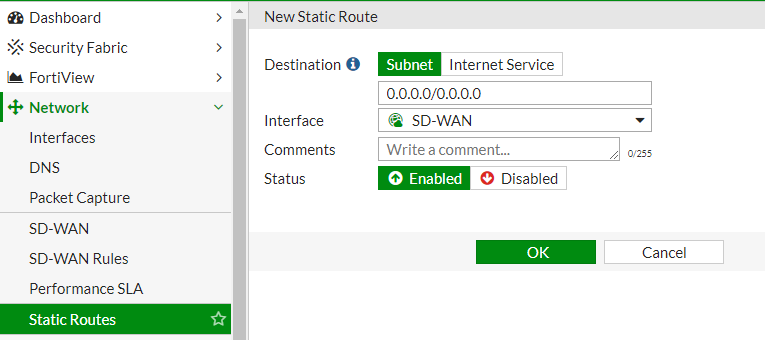
The next step is to set up routing using our new interface. To do this, we need to delete the default routing configured on the device and add a New Static Route using our SD-WAN interface.
The last step is to set the New Firewall Policy, where we previously used the WAN interface and set the new SD-WAN interface.
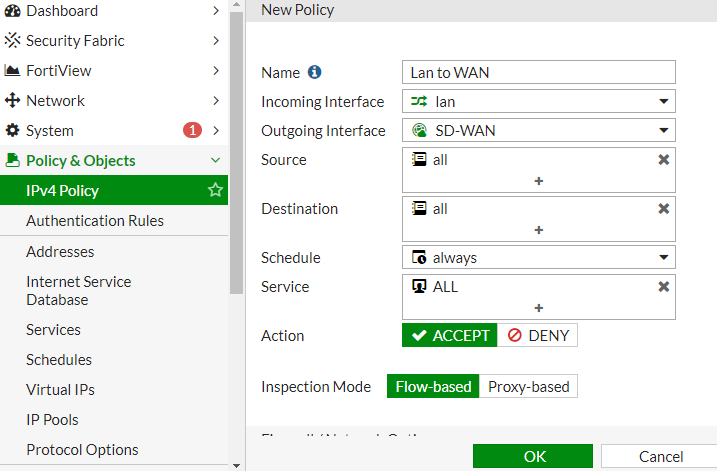
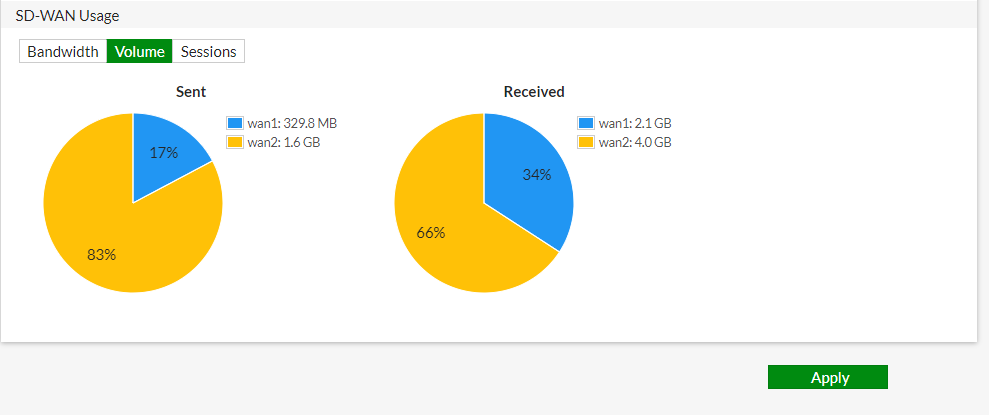
This way, we have set up two internet links using SD-WAN functions. Now we can freely control the traffic and distribute it according to the availability of the internet links.